Understanding Workspaces and Knollis
Overview
Before you begin creating more copilots, it helps to understand how Knolli is organized.
Workspaces are the foundation of your Knolli environment. Each workspace acts as a private container for your projects, data, copilots, and team members. Inside a workspace, you create and manage one or more Knollis, each with its own purpose and configuration.
The Knolli Dashboard
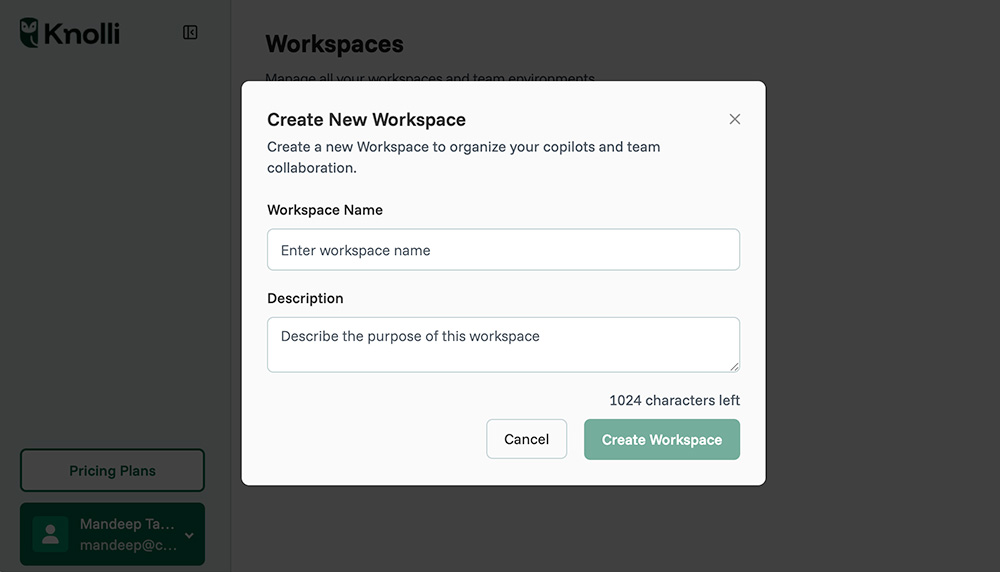
When you log in for the first time, you will see a blank dashboard. Click on Create Workspace to create your first workspace.
A workspace is like an organization or folder. It holds all of your Knollis, uploaded knowledge, integrations, and billing settings. You can have multiple workspaces, for example, one for your company and one for client projects.
- Understand the workspace structure
- A workspace is like an organization or folder. It holds all of your Knollis, uploaded knowledge, integrations, and billing settings. You can have multiple workspaces, for example, one for your company and one for client projects.
- Understand what a Knolli is
- A Knolli is your actual AI copilot. It lives inside a workspace and draws knowledge from the files, documents, and data sources stored there. Each Knolli can have its own personality, guardrails, and monetization options.
- When to create multiple workspaces
- You manage several client projects that need different data sets.
- You want to separate internal and external copilots.
- You want to give specific team members access only to certain projects.
- Invite team members to a workspaceFrom your workspace settings, you can invite collaborators. Assign roles such as Admin, Creator, or Viewer depending on their responsibilities.
- Admin: Full control, including billing and access management.
- Creator: Can build and edit Knollis.
- Viewer: Can use Knollis but not modify them.
- Switch between workspaces
- Use the workspace dropdown in the sidebar to move between different organizations or client environments. Your Knollis and settings are unique to each workspace.
Tips or Common Issues
- If you do not see your Knolli, check that you are in the correct workspace.
- Only admins can invite or remove members from a workspace.
- Use clear naming conventions, such as ClientName_Workspace, to avoid confusion.
- Keep shared data inside the right workspace so it is not accidentally exposed to the wrong team.
Next Steps
Now that you understand how workspaces and Knollis fit together, you can manage your environment more efficiently.
Next, explore Navigating the Dashboard to learn where to find your copilots, knowledge base, and workspace settings.